The Biggest Mistakes You're Making When Cleaning A Wood Cutting Board
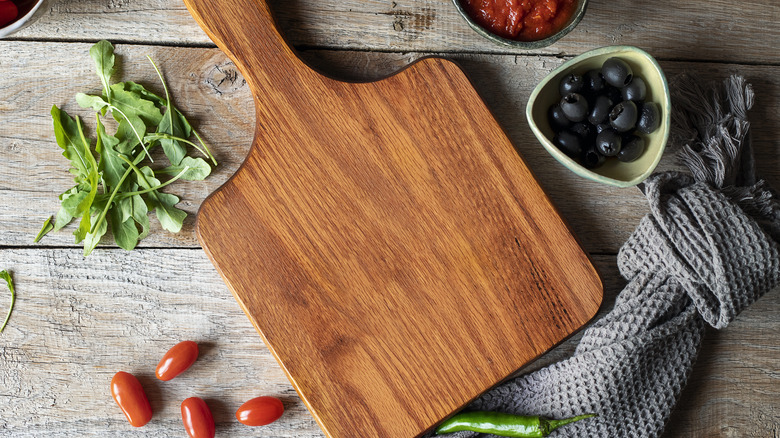
Every home chef needs a high-quality cutting board. A cutting board is a durable surface that is used to cut and prepare foods and can conveniently be moved around the kitchen. Commonly made from wood, plastic, or bamboo, they protect countertops from being scratched and damaged while also preserving the sharp edges of your knives. Nobody wants a dull knife!
Wood is a popular choice, and if you're in the market for a wooden cutting board it's easy to get overwhelmed by all the different options. Wood cutting boards are made from either hardwoods or softwoods, and the type of wood you choose will depend on your needs in the kitchen.
Hardwoods, such as maple or walnut, are durable, low-maintenance, and can last longer than their softwood counterparts. Softwood cutting boards are less common, and made from woods like larch and hinoki. Softwoods are lighter in both color and weight than a hardwood cutting board, and provide a softer cutting surface that is ideal for expensive, delicate knives.
When properly cared for, wooden cutting boards have natural antimicrobial properties. So, not only are they pretty to look at and convenient to use, but they can also aid in safer food prep in the kitchen.
Wooden cutting boards are a beautiful, functional, and timeless addition to any kitchen, and they can last for generations when cared for properly. So, here are the biggest mistakes you're making when cleaning a wood cutting board, and how to fix them.
Using the Dishwasher
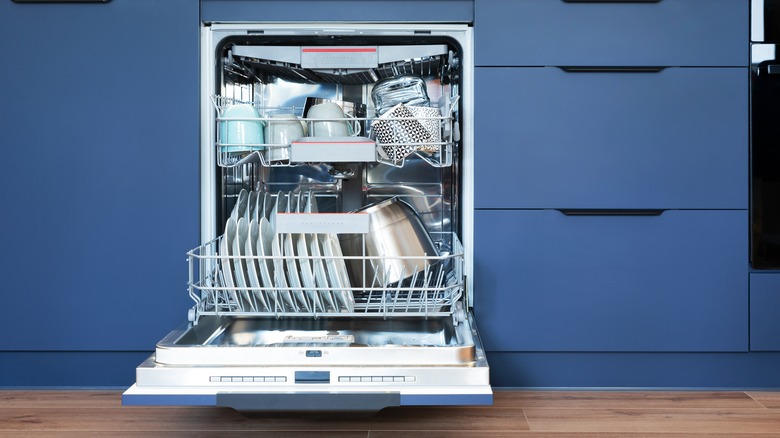
The cardinal sin of caring for wooden cutting boards is using the dishwasher to clean them. And, it only takes one wash cycle for irreparable damage to occur.
The intense heat and prolonged exposure to water in your dishwasher can cause the wood to warp, split, or crack, damaging the board beyond repair. While it's tempting to just throw it in the dishwasher and hope for the best, you're much better off taking a few extra minutes to care for it properly after every use (the same is true for kitchen knives, wooden spoons, and travel mugs).
The dishwasher is a modern marvel of convenience, and it seems like the perfect way to get a thorough clean on an item that is used daily. They work wonders for plates and glasses but, unfortunately soaking wood in water for a prolonged time is probably the worst thing you can do to it.
Not cleaning after every use
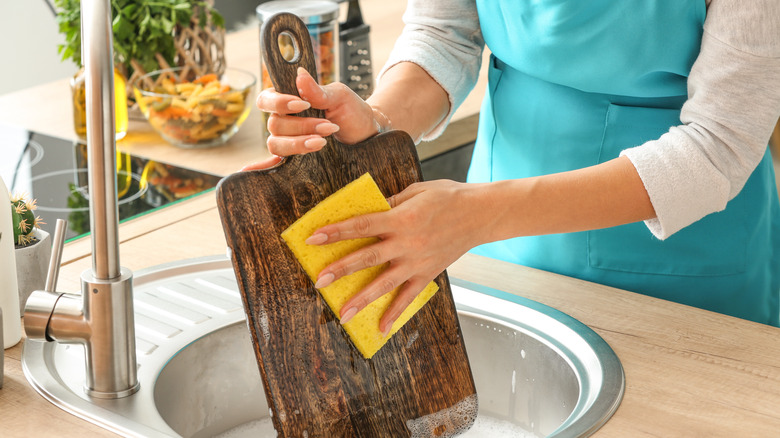
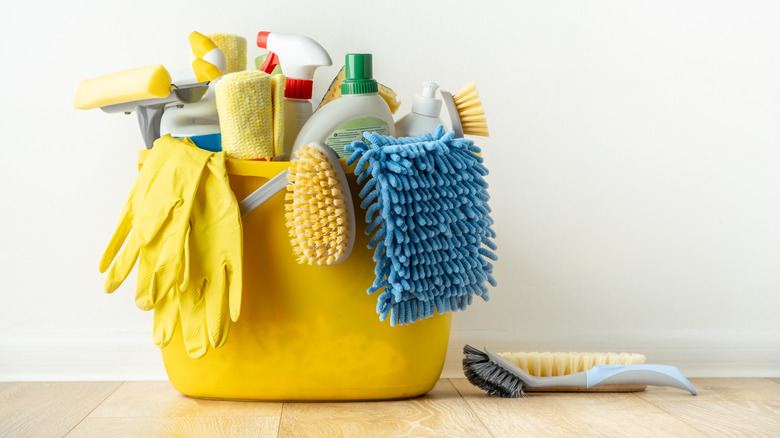
While you don't want to throw your cutting board in the dishwasher, you will want to clean it after every use. Skipping a thorough cleaning can lead to bacterial growth and cross-contamination, especially if you're using one cutting board for everything (meat, vegetables, cheese, etc.). It's important to clean the board to remove any potential contaminants, even if you just chopped vegetables. But, cleaning your cutting board is simple, and once you get into a daily routine you won't notice the extra minutes it takes to clean.
You should have a few supplies on hand to wash your board: warm water, dish soap, a sponge or gentle dish brush, and a clean, dry towel. Gently wash the board with dish soap and warm water, using your sponge or brush. Be sure to clean both sides of the board to remove any contaminants that may have been on the counter, or made it to the back of your board.
Alternatively, you can clean your board with lemon and salt. Cut a lemon in half. Sprinkle some coarse salt on your cutting board. Rub the lemon over the salt in small circles until you've cleaned the whole board. Let it sit for about five minutes.
With either method, you'll finish by rinsing well, removing all soap (or lemon and salt), and patting dry with your cloth. Leave in the open air to dry completely. But, you might also be making a mistake while drying your board.
Neglecting to dry properly
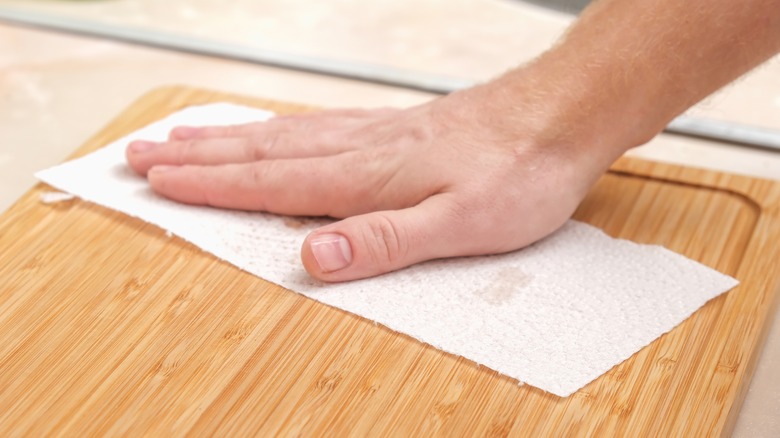
You might think that once you've cleaned and dried your board, your work is done. Not quite — but you're almost there! There is one more simple step that you must take to ensure your board stays in tip-top shape, and that is drying it properly.
Wiping it off and leaving it on the counter just won't cut it. After washing, dry it with a cloth or paper towel, taking care to make sure there isn't any standing water left on the board. While wood is antimicrobial and safe for kitchen use, it can still get a little funky if not properly cared for. Because of the porous nature of wood, if left wet, water will soak into the board and cause mold and mildew. In some instances, you can remove the mold and mildew and keep using the board. In other cases, mold and mildew can make a cutting board unusable. You'll save time, money, and energy if you can avoid it in the first place.
Even after hand-drying, the board will likely still be damp, so it's important to leave it upright to dry which allows both sides of the board to dry at the same time. This also stops water from seeping further into the board if it's left flat. Always let the board air dry completely before storing, and never put it away wet or leave it on its side to dry.
Cleaning with the wrong chemicals
For daily cleaning, you can wash your board with regular dish soap, or use the salt and lemon method. Sometimes, you need to address bigger issues, like ongoing odors or stains that won't come out, or you feel the board is due for a thorough cleaning. In these cases, you may need to deep clean your cutting board with bleach.
There is a time and a place for using bleach on your cutting board. However, applying harsh cleaning agents, like bleach, should be handled with care. While bleach can combat bacteria, it can also stain and dry out your cutting board — the latter leads to cracks, which can then harbor bacteria or promote mold and mildew. If your board is due for a deep cleaning with bleach, here's how to proceed.
Mix one tablespoon of unscented liquid chlorine bleach with one gallon of water. Douse the board in the solution and let it soak for several minutes. You can also fill your sink with the solution, and let the board soak in the sink for a minute or two. After soaking, rinse with clean water, pat dry, and let it air dry completely before putting it away.
Ignoring odors

Wooden cutting boards can absorb odors from food, especially garlic, onions, and fish. Failing to neutralize these odors early on can result in a board that affects the taste of other foods. Nobody wants their chicken to have leftover fish flavor, so it's important to stay on top of odors before they get too far gone. This can be remedied by using natural deodorizers, some of which you may already have in your pantry.
Cleaning your board after every use with salt and lemon is one natural technique to keep odors at bay. If you're using lemon and salt to clean your board regularly, you're already a step ahead of pesky odors.
Have a stinky board, but don't have a lemon on hand? You can also deodorize using baking soda or vinegar.
All three methods require you to start with a clean board. For the baking soda method, make a paste using one part water to three parts baking soda. Scrub the board thoroughly with the paste and let it sit for a few minutes. To use vinegar, simply pour white vinegar on the board and wipe it down. Once you've scrubbed with your baking soda paste or wiped down with the vinegar, rinse thoroughly and, like always, let dry in an upright position. Still stinky? Try again, using the same method or branching out and trying one of the other techniques mentioned here (like bleach) until you've scoured the stink away.
Ignoring cracks and splits in the wood
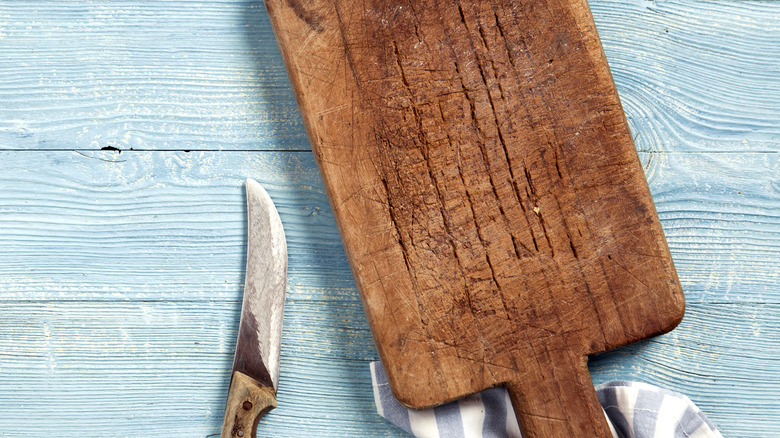
Over time, your wooden cutting board is going to reach a state where it has seen better days. Even with proper care, you might find some splitting, cracks, or warping in the wood (this is especially true for thinner boards made with lesser quality wood than some of the high-end boards). Cracks and splits are the perfect places for bacteria to hide and are ideal spots for mold or mildew to take root. It can be hard to clean those little nooks and crannies, but it's important to fix them sooner rather than later.
In addition, not repairing or addressing cracks and splits in the wood can make the board difficult to clean properly. Once the cutting board shows significant damage, it's crucial to sand it down or, in severe cases, replace it to ensure food safety.
So, when can you fix it, and when should you replace it? If your board is looking a little rough and is covered in scratches from regular knife use you can probably sand it down using a range of sandpaper grades from 80 to 400. If your board has a minor crack but is otherwise in good condition, you can consider fixing it with some food-safe wood glue. But, if your board is warped, splintered, or has a one or more significant cracks, the best and safest option is to replace it with a new one
Scrubbing too hard

Most of us want to keep things in the kitchen clean and germ-free. Nobody wants to get sick because they didn't clean something properly. But, with wooden cutting boards, and most wooden kitchen items, being gentle is best. Aggressive scrubbing, especially with abrasive materials, can damage the surface of the wood, creating grooves where bacteria can hide and multiply.
While you certainly want to clean your cutting board after every use, the goal is to find the balance between cleaning thoroughly and gently. Go too easy on it or miss a cleaning, and bacteria can take hold. Go too hard on it, and bacteria can also take hold. The key is to use tools that are safe and effective for your cutting board. They should achieve the cleanliness you desire, but not damage your board in any way.
Always use a sponge or gentle dish brush when cleaning your cutting board. Avoid using tools that might leave scratches behind, so skip the scrub brush or steel wool. It can be tempting to use those tools to remove food that might be stuck on the board, or to give the board a more intense cleaning, but they will do more damage than good. When it comes to caring for your wooden cutting board, err on the side of gentle.
Forgetting to oil the board

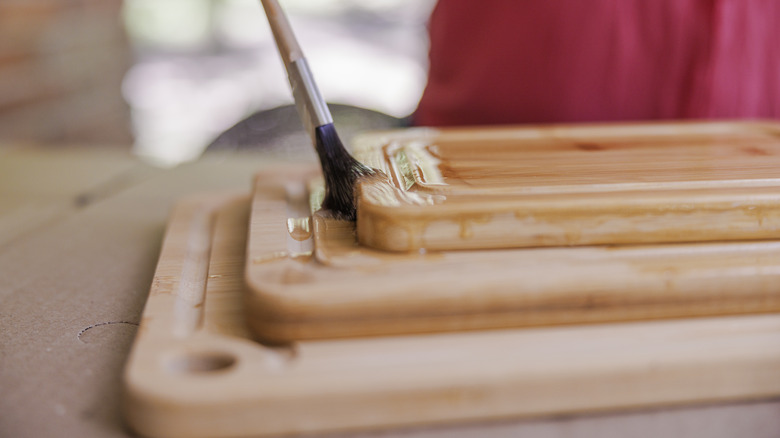
Even with a diligent cleaning routine, there's one more thing you need to do to your wooden cutting board to keep it beautiful and functional for years to come. Wooden cutting boards need to be oiled, or seasoned, to keep them from drying out. If you don't oil your cutting board regularly, it can become dry and brittle, which leads to cracking and splintering.
Oiling your cutting board is easy. You don't need to oil your board every time you use it. If you're unsure where to start, plan on oiling it once a month. You can always oil it more often if it starts to dry out.
You'll need a mineral or food-safe oil along with a board cream designed for wooden cutting boards. Wash and dry your board before oiling. The board should be thoroughly dry before you start. Liberally apply oil to your board, using a towel to rub it in. Let the oil soak into the board for several hours (or overnight). Keep the board in an upright position while the oil soaks in.
Once the oil has soaked in, apply the board cream. Use a rag to buff the cream into the board in small circles. The board cream is like wax, and it won't fully absorb into the board and creates a barrier to help keep out bacteria. After buffing, wipe off the excess.
Not doing regular deep cleans
Sturdy wooden cutting boards are an investment that can last for years. And, if you're new to them, the care can be daunting, but setting a regular deep clean regimen is key and will help keep your board in beautiful condition.
To make sure you're not forgetting to do regular deep cleans, plan one before you oil the board each month. You can use the lemon and salt method, or you can opt for bleach, vinegar, or baking soda. Once your board is deep cleaned and oiled, it may also be due for a deep conditioning (if your board is looking excessively dry, it's time).
After you've oiled the board, rub the board cream into your board. Let it sit for several hours before wiping off any excess. You can even wrap it in plastic wrap and leave it overnight (or up to a week). The plastic wrap will hold in the moisture of the board cream, allowing the wood to absorb it more efficiently. As the wood plumps up, smaller cracks will be sealed. You'll spend a little extra time each month on these chores, but your cutting board will last for many years.