Soft, Medium, And Stiff Peaks Are Not The Same When It Comes To Whipped Cream
Homemade whipped cream is one of the easiest ways to take any dessert to the next level. Sure, the canned spray stuff is convenient (and fun to eat straight from the nozzle), but homemade whipped cream really is unmatched. Plus, the homemade stuff is actually super simple to make at home, requiring just two items: a carton of heavy whipping cream and something to beat it with. For the latter, a stand or hand mixer makes the process easier, but a whisk will also work if you don't mind getting a workout while you whip.
From there, beat your cream on high speed for just a few minutes, et voilà — clouds of lovely whipped cream. While the process is easy, what can be confusing is knowing when to stop. Most importantly, there are three stages of whipped cream: soft, medium, and stiff. The longer you beat the cream, the firmer your whipped cream will become, but if you whip for too long, the cream will separate and turn to butter. For the uninitiated, the threat of over-whipping can be a little nerve-wracking so learning to identify these different whipped cream stages and how to use whipped cream at each of these levels is a must.
Start homemade whipped cream the right way
Before you start your whipped cream, there are a few important details to know. First, the cream and all of your whipping tools should be very cold. Place your tools — the bowl and the whisk attachments or beaters for your mixer — into the freezer for 10 minutes to completely chill them. Keep the container of cream in the fridge until you're ready to start. Choose a large bowl since the cream tends to spatter at the beginning, and it will also increase in volume as it whips.
To make sweetened whipped cream, use powdered sugar; the fine texture blends smoothly into the cream with no grainy texture. Powdered sugar also contains cornstarch, which will help the whipped cream hold its shape.
Finally, the whole process takes just minutes, so watch it carefully. If using a stand mixer, don't allow distractions to lure you away! The difference between the whipped cream stages is a matter of minutes, and you don't want to run the risk of overwhipping.
Whipped cream with soft peaks
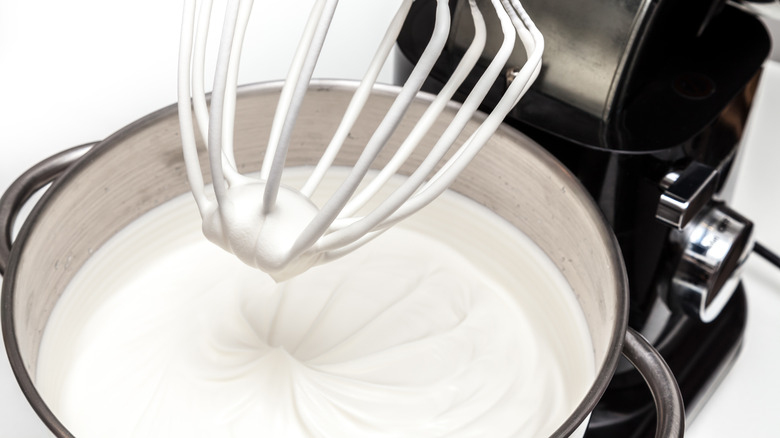
Start your whipped cream by pouring the cold heavy cream or whipping cream into a large, chilled bowl — for sweetened whipped cream, add powdered sugar to the bowl as well. Begin mixing it at medium-low speed. As the cream starts to thicken gradually increase the speed of your mixer. It will only take a minute or two for the whipped cream to reach the first stage: soft peaks. How can you tell? At this stage, the cream on the end of the beater or whisk will be thick with a small peak that easily flops over. It's very pillowy and creamy, with just enough structure to give it a soft, mounded shape.
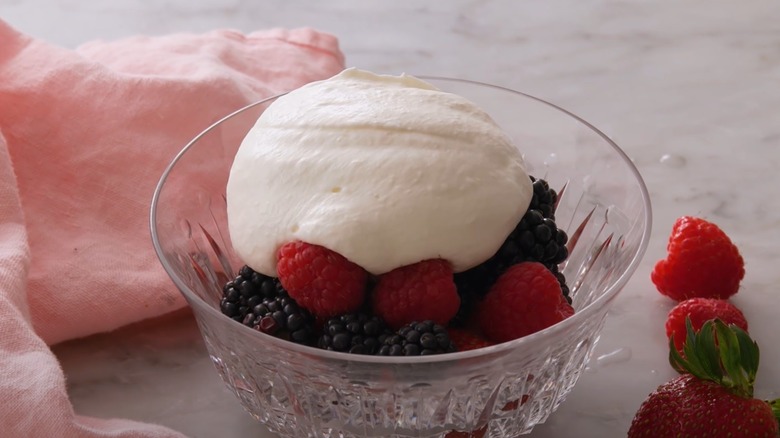
Whipped cream at the soft peak stage can be used to top rustic desserts like galettes and strawberry shortcakes, or it can be folded into other ingredients like lemon curd, custard, or softened cream cheese to make pie fillings, mousse, and frozen desserts.
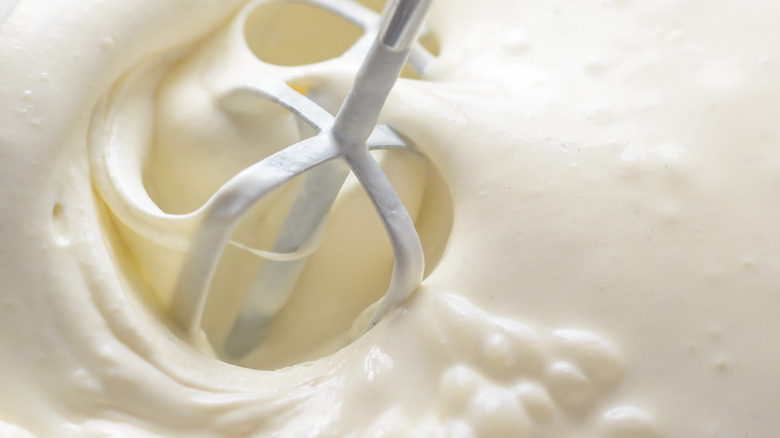
Whipped cream with medium peaks
Getting from soft to medium peaks in homemade whipped cream takes less than a minute longer of beating. Continue whipping the cream for another 30–45 seconds until it's thicker and beginning to have some shape. When you lift the whisk or beater from the cream, the peak will be a little firmer than it was at the soft peak stage — but still eventually fold downwards. The beaters will also leave more defined trails in the bowl of cream.
Medium peak-whipped cream will hold its shape better when spooned onto desserts and will add a slightly firmer texture when folded with other ingredients. However, it's not quite sturdy enough for piping: if medium-peak whipped cream was piped from a decorative nozzle onto a cake, the swirls and shapes would slowly soften and lose their definition. For this kind of task, you need to take your whipped cream to the next and final, pre-butter stage: stiff peaks.
Whipped cream with stiff peaks
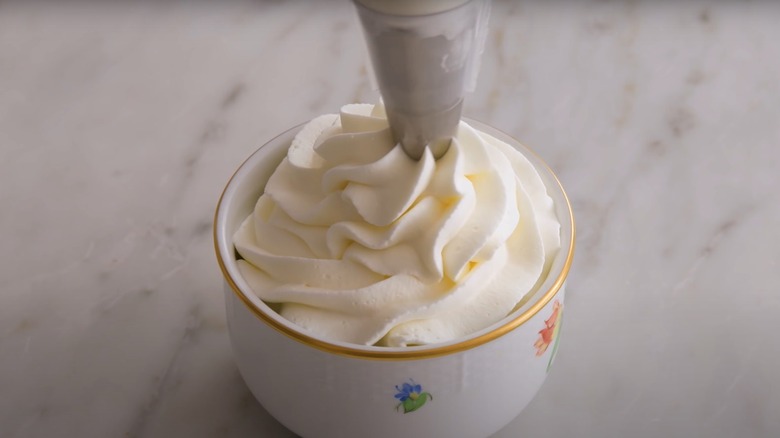
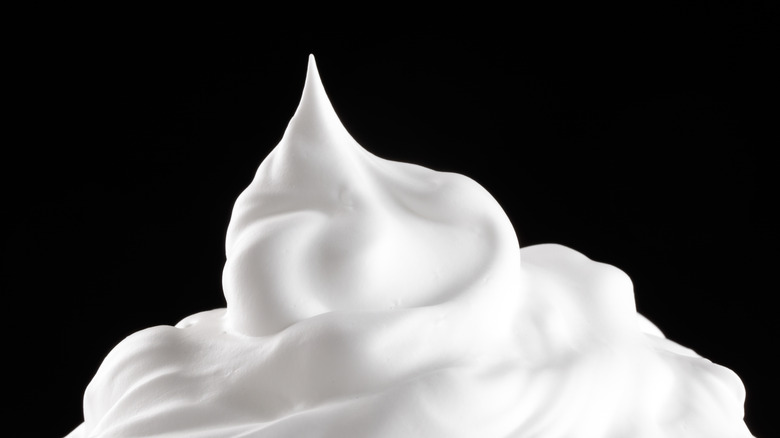
Continue beating your whipped cream until it's very thick but still smooth. The cream will have lots of definition: when the beater or whisk is picked up from the cream, there will be a peak that holds its shape. There will also be clearly defined trails in the bowl of whipped cream. This is the stiff peak stage, the firmest that it can be and still be considered whipped cream, and it will have a texture much like that of canned, spray whipped cream.
You can simply dollop it onto desserts or drinks with a spoon, but that firm texture makes it ideal for a piping bag and decorative nozzle. Use stiff peak-whipped cream to frost a cake, complete with piped swirls. Or pipe some into hot cocoa or onto sweet, creamy cocktails.
Remember that if whipped cream is beaten beyond the stiff peaks stage, it will begin to turn into butter. You'll know it's happened when the whipped cream begins to look curdled and its color looks more yellow than white. Unfortunately, when this happens, there's no going back; you may as well continue beating the cream fully into butter and save it to enjoy with tomorrow morning's muffins.
When you know the differences between the three peak stages and pay close attention to the cream as it's whipping, you'll find it very easy to achieve the perfect whipped cream texture for your recipe or dessert.