Use These Dollar Tree Finds To Make Your Own Dish Drying Rack
We may receive a commission on purchases made from links.
Among our ever-growing rotation of affordable, elementary dollar store kitchen purchases utilized in clever ways, we've seen some real winners, like utilizing Dollar Tree placemats for a cleaner fridge and a DIY coffee mug storage hack that couldn't be easier. Today, we're using a handful of mega-cheap Dollar Tree finds and the bare minimum craft effort to make a dish drying system that exactly suits your needs and is probably bigger and less expensive than any dish rack you might find at the store.
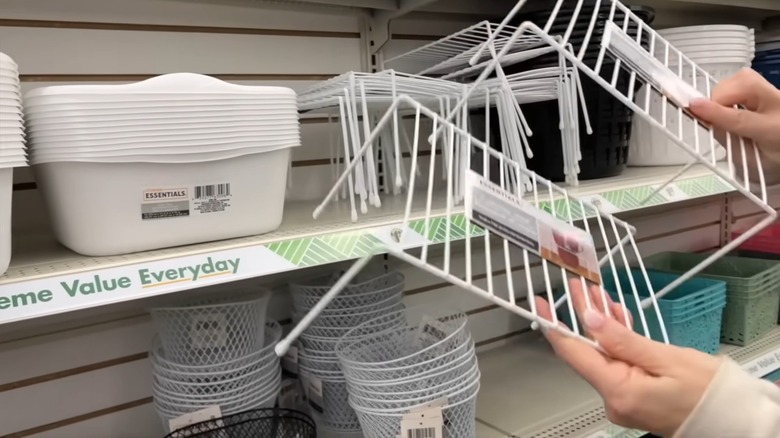
Your exact shopping list for this project depends on what dishes you tend to dry the most. Wire racks are the basis for your dish rack(s), and you can buy however many you have room for beside your sink (maybe even your super-efficient sink featuring double faucets?). Grab small wire baskets for the top, along with file holders. You will note that these pieces are all made of rubber-lined wire, making them lightweight and waterproof. Place your wire racks for the bottom, then use zip ties to fasten your baskets or file holders to the top for roomy, abundant storage of utensils or plates, respectively.
Lay out an absorbent, thick dish towel beneath this setup to soak up drips. Glassware can be dried upside-down underneath. As long as you are tidy with your zip ties, these DIY dish drying racks will look great and work super effectively while providing a ton of drying room. Best of all, they are modular, so you can arrange them depending on the space you have.
A few considerations for your new Dollar Tree dish rack
Once you get the hang of how to put these DIY dish racks together, you will realize that there are a lot of possibilities for customizing your project to make it exactly what you need for your kitchen. You can zip-tie more than one rack together, making a longer and/or wider base for your dish rack with tons of room on top for baskets. Make sure that you have enough small baskets for silverware and for your larger utensils, like wooden spoons, whisks, or spatulas. If you are only using a single rack for an apartment-sized drying rack for a single person, how about grabbing a Dollar Tree tray to use underneath for drip-drying?
Of course, just like any dish rack, your DIY project will need to be cleaned from time to time, since mold and mildew have an unfortunate tendency to build up in the nooks and crannies (which can happen with any rack). We recommend keeping plenty of extra zip ties on hand so that you can completely disassemble your rack every few cleanings to really sanitize it. On that same note, if you do use a dish towel underneath your rack, make sure that you change it out every few days to avoid unpleasant odors and an unclean drying area for your squeaky-clean dishes!