For A Better-Looking Gingerbread House, Avoid This Easy Mistake
We may receive a commission on purchases made from links.
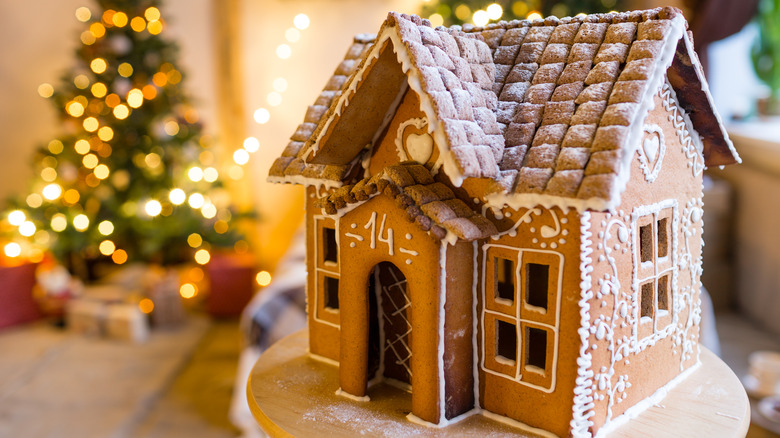
Some of our favorite holiday traditions are also the sweetest ... literally! We love leaving cookies out during Christmas, delivering sweets to friends and neighbors in adorable, affordable Dollar Tree mailbox tins, and, last of all — but definitely not least! — building gingerbread houses. Gingerbread is a holiday confection with medieval origins, and it has evolved to the point where, around December, some of us spend hours constructing dainty, oh-so-darling cottages made of cookies.
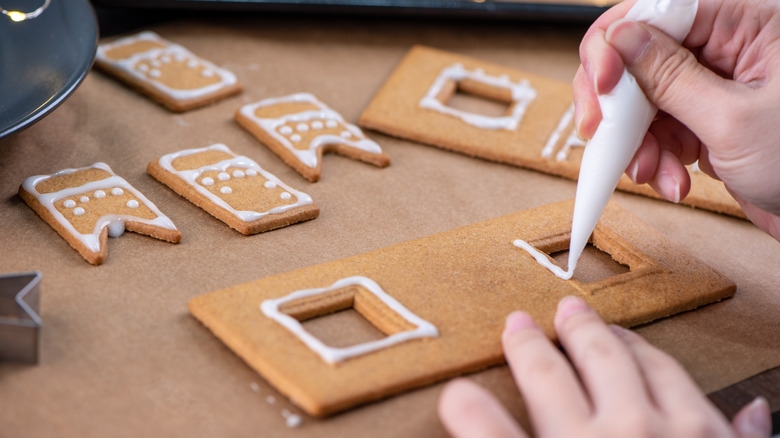
If you are out to assemble the prettiest gingerbread house on your block, there's an underrated tip that you should keep in mind. It's effortless to implement but pays big dividends when it comes to the appearance of your build. Essentially, you want to decorate the pieces of your house before you put them together, instead of after. If you've ever watched in horror as your piped frosting melts down the petite walls and ridgeline of your gingerbread roof, you know that, even with all the care in the world, gingerbread house decorating can be a fraught matter.
No matter whether you are baking your own gingerbread pieces from scratch or using a store-bought kit complete with colorful candies, the secret is to lay your pieces flat, decorate them as you wish, and then let them dry. Two hours is the bare minimum that you want, though overnight is even better for some decorating ingredients. When your frosting has dried out, your carefully selected gumdrop string lights and peppermint porthole windows won't be in so much danger of collapsing, and your house will look all the nicer when you finally put the pieces together.
A few other tips for better gingerbread house aesthetics
Putting together a durable, beautiful gingerbread house is within your reach as a home baker, as long as you utilize good techniques. If you are baking your own gingerbread, you want strong gingerbread pieces but don't necessarily need to use "builder" grade gingerbread, as some recipes call for. Instead, make sure that your pieces are fully baked, with no give or softness. Cut your pieces around cardboard templates for the right shape. When they emerge from the oven, you can use a handheld microplane grater to file down the edges and make them perfectly straight, which will, in turn, give a tidier look when put together. Use royal icing as your glue, whether dealing with homemade or store-bought gingerbread. Other frostings may not be sturdy enough for the cookie construction biz! Also, the stark white color mimics snow.
If you are a novice decorator of sweets, consider practicing your piping techniques before aiming a pastry bag of icing at your gingerbread chateau. Experienced cake decorators are familiar with the wrist-flicking motion necessary to perfect a frosting dollop or swirl, but if you don't have that muscle memory established, consider a few trial decorations piped over a piece of wax paper. Straight lines with frosting are harder to pull off than they look, and that goes double for ideal squiggles or curves. A little trial-and-error before applying frosting to your actual gingerbread pieces will help tremendously.